

How To Change Clutch Slave On 1993 Sonoma
A clutch slave cylinder is a fellow member of the clutch organization that provides leverage assistance to the clutch fork. The clutch slave cylinder operates just like a hydraulic cylinder on a nail lift. The cylinder is connected to the clutch master cylinder located on the firewall next to the brake master cylinder through a hose.
When yous push the clutch pedal, brake fluid flows from the clutch master cylinder to the slave cylinder, applying the force per unit area necessary to engage the clutch. When you release the clutch pedal, a render spring located on or in the slave cylinder will force the restriction fluid back to the clutch master cylinder.
Part 1 of viii: Know the signs of failure
There are two different ways to determine if the clutch primary cylinder is failing or has failed. The principal chamber seal in the middle of the clutch slave cylinder will split and leak out brake fluid causing the reservoir in the clutch main cylinder to get low.
As the pedal is pushed downward, the plunger inside the cylinder housing volition crusade brake fluid to spray out at a strong force by the seal. As the brake pedal is released, the leap tension from the return spring will pull the plunger back into its housing causing air it be drawn into the slave cylinder.
The return spring breaks or weakens then the slave cylinder push button rod will remain pressed out with total force to the clutch fork. The clutch pedal volition press downwards to the floor, yet, it will not render when letting upwardly on the clutch pedal.
Pascal's constabulary states that all areas that have confined fluid in them are non compressible and all pressure is equal in every location. The application of a larger dimension will take more leverage than a smaller dimension.
The Pascal'due south law plays a large role in the clutch hydraulic arrangement. Every bit long as the arrangement has fluid at the proper level, practical forcefulness, and all of the air bleed out, then the clutch hydraulic system will work correctly. However, when air is induced into the system the air becomes compressible allowing the fluid to create a stand up still.
If the fluid is low or if the applied force is minimal, then the strength volition be depression causing the slave cylinder to operate at about half way. This will cause the clutch to slip and not engage any gears every bit the clutch will not release properly.
Function 2 of eight: Preparing to piece of work on replacing the clutch master cylinder
Materials Needed
- Flash light
- Floor jack
- Jack stands
Step 1: Park your vehicle on a apartment, difficult surface. Make sure that the manual is in park (for automatics) or in 1st gear (for manuals).
- Note: This is only for vehicles with all wheel drive transmissions or rear wheel bulldoze transmissions.
Step two: Place bike chocks around the rear tires. Appoint the parking brake to the lock the rear tires from moving.
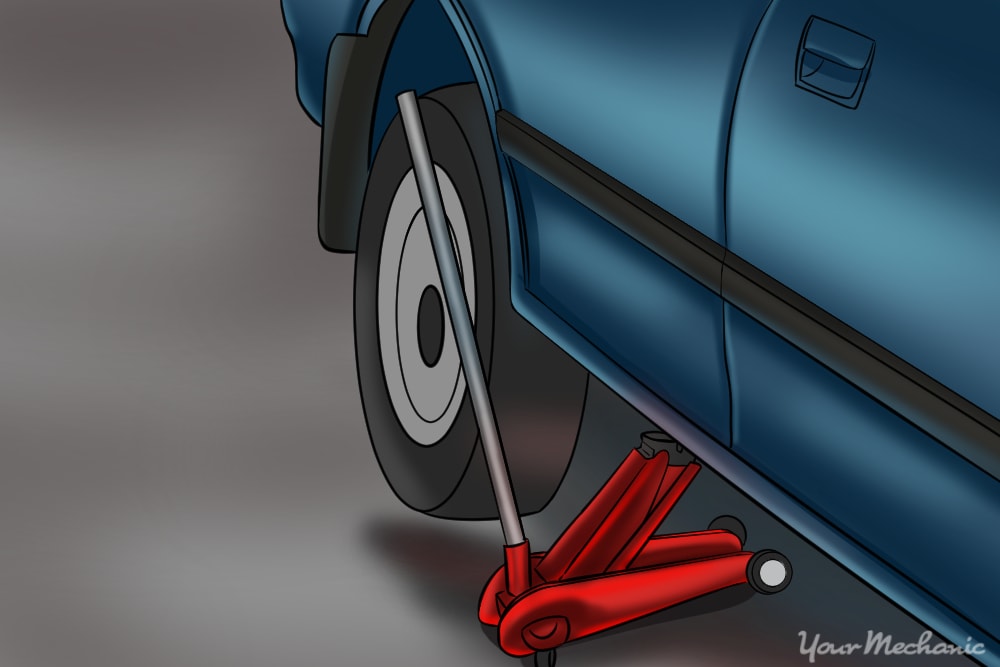
Footstep 3: Raise the vehicle. Using a floor jack, lift under the vehicle at its specified jacking points until the wheels are completely off the ground.
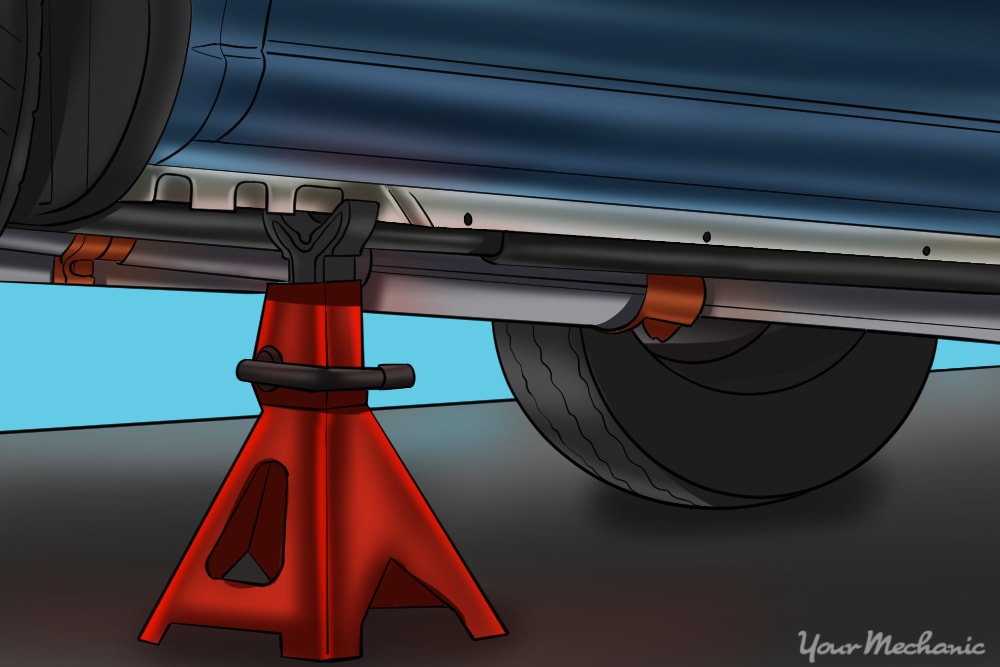
Step 4: Place the jack stands. The jack stands should become under the jacking point Locations then lower the vehicle onto the jack stands.
For most modern cars, the jacking points for jack stands will be on the compression weld just under the doors along the bottom of the auto.
- Note: It is best to follow the vehicles owners manual for proper jacking locations.
Part 3 of 8: Verifying the clutch slave cylinder condition
Cloth Needed
- Flashlight
Footstep 1: Grab your creeper and go under the vehicle. While using your flashlight, look at the clutch slave cylinder for any impairment and leakage.
If you do not see whatsoever fluid leaking out pull back on the dust kicking. Be certain to place a drip pan nether the slave cylinder for that brake fluid may leak out.
Step 2: Open the hood to your vehicle. Locate the clutch master cylinder and remove the comprehend to the reservoir.
Verify if there is whatsoever brake fluid inside the reservoir.
Part four of 8: Removing the clutch slave cylinder
Materials Needed
- Allen wrench ready
- Boxed stop wrenches
- Brass punch
- Breaker bar
- Baste pan
- Fastener remover
- Needle olfactory organ plyers
- Ratchet with metric and standard sockets
- Torque wrench
- Torques bit set
- Vampire pump and bottle
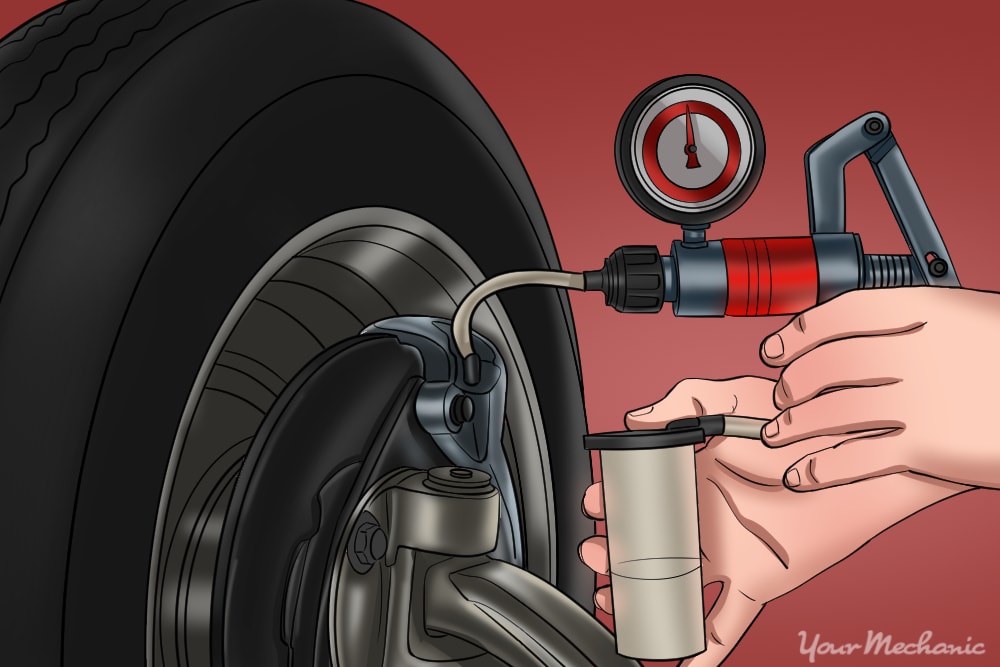
Step 1: Grab your vampire pump with a canteen. Remove the reservoir cap from the clutch master cylinder's reservoir.
Employ the vampire pump and retrieve all of the brake fluid from the reservoir. When washed removing all brake fluid, put the reservoir cap dorsum on.
- Alarm: Do not become restriction fluid on any paint. This will cause the paint to peel and chip away.
Step 2: Grab your tools and go under your vehicle. Remove the hydraulic line from the clutch slave cylinder.
Exist sure to put a plastic purse on the stop of the line with the rubber ring to continue brake fluid from leaking out of the line.
- Note: Exercise non curve the hydraulic line for it may crack or interruption.
Stride 3: Remove bolts. Remove the two bolts or clamp that secures the slave cylinder to the transmission.
Part four of 8: Removing the clutch hydraulic system assembly
Materials Needed
- Allen wrench set
- Boxed stop wrenches
- Contumely punch
- Breaker bar
- Drip pan
- Fastener remove
- Needle nose plyers
- Ratchet with metric and standard sockets
- Torque wrench
- Torques bit gear up
- Vampire pump and bottle
Footstep ane: Grab your vampire pump with a bottle. Remove the reservoir cap from the cylinder's reservoir.
Apply the vampire pump and retrieve all of the brake fluid from the reservoir. When done removing all restriction fluid, put the reservoir cap back on.
- Warning: Practice not go brake fluid on any paint. This will cause the paint to peel and chip away.
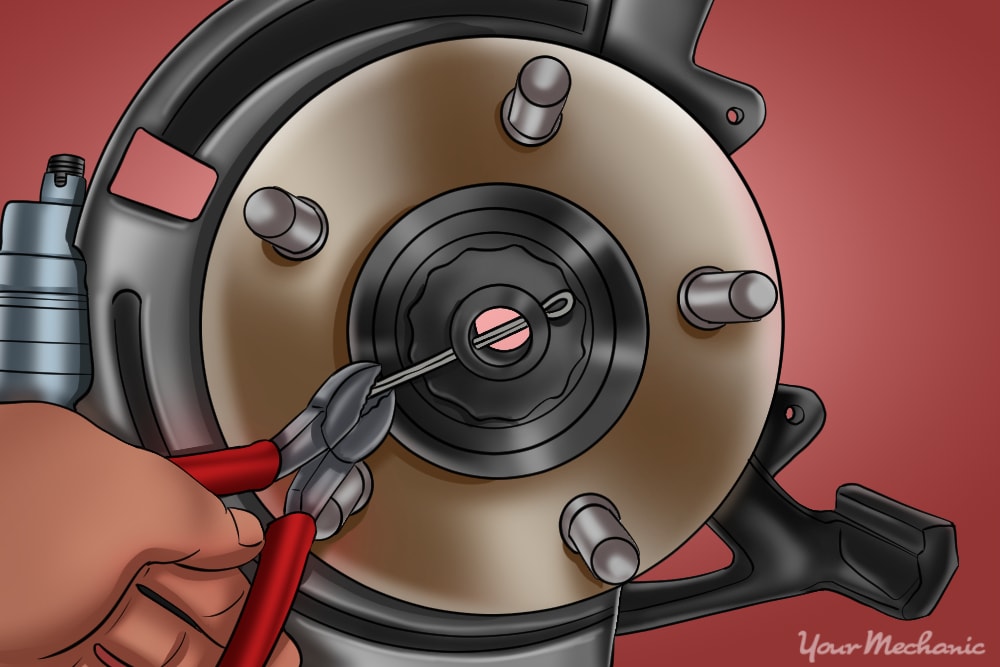
Step two: Remove the cotter pin. Go in the driver's compartment of the vehicle and remove the cotter pin from the anchor pivot on the clevis.
This will exist attached to the clutch master cylinder push button rod with a pair of needle nose plyers.
Step three: Remove the anchor pin. Remove this from the clevis of the push rod.
Step 4: Remove the mounting nuts. Remove them from the clutch master cylinder.
Step 5: Locate the hydraulic line. Information technology volition link the clutch master cylinder to the slave cylinder.
Remove all mounting insulated clamps that mount the hydraulic line to the vehicle.
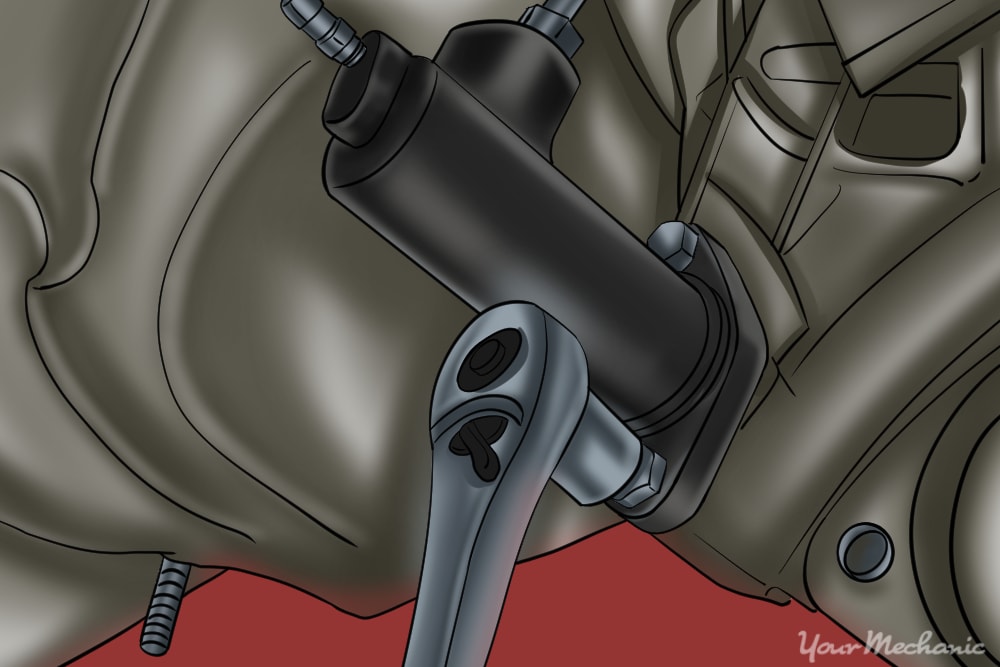
Step 6: Grab your creeper and go under the vehicle. Remove the two bolts or clamp that secures the slave cylinder to the transmission.
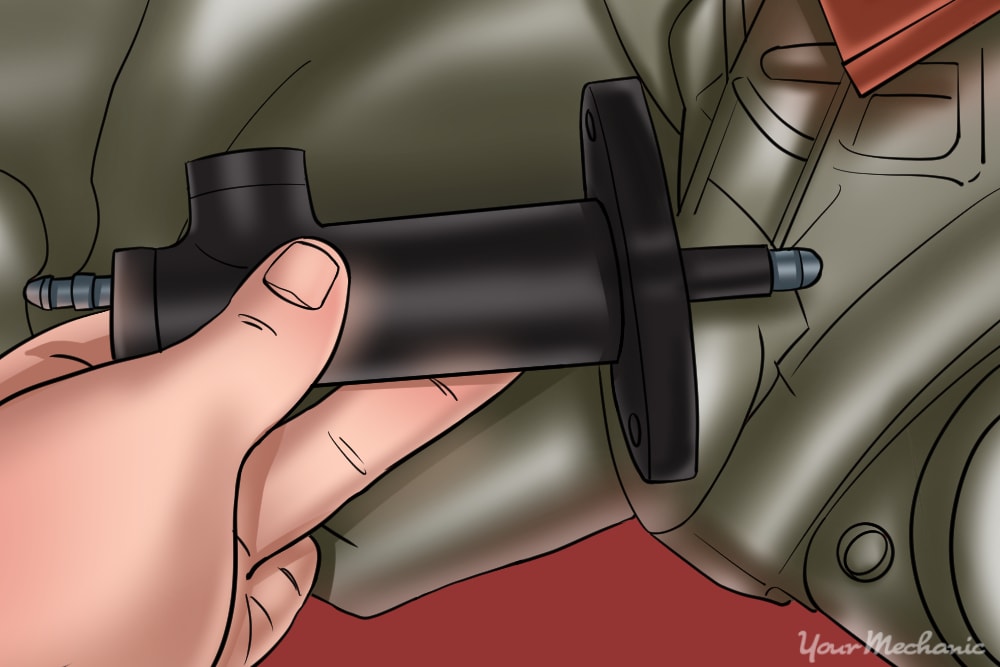
Step 7: Remove the entire system. Very carefully, remove the entire system (clutch master cylinder, hydraulic line, and slave cylinder) upwardly through the engine compartment.
- Alert: Do not bend the hydraulic line for information technology volition break.
Part 5 of eight: Prepare the slave cylinder and hydraulic system associates
Materials Needed
- Allen wrench set
- Boxed end wrenches
- Brass punch
- Breaker bar
- Drip pan
- Fastener remove
- Needle nose plyers
- Ratchet with metric and standard sockets
- Torque wrench
- Torques bit set up
- Vampire pump and bottle
Step i: Prepare the clutch slave cylinder. Remove the clutch slave cylinder from its package.
Visually check to see if there are any damages to the cylinder and boot. Y'all may have to install the return spring, push rod, and boot.
Step two: Set up the clutch hydraulic system associates. Remove the clutch principal cylinder and slave cylinder assembly from its package.
Visually bank check to come across if in that location are whatsoever amercement to the cylinder. Make sure that the seal is in the back of the clutch chief cylinder housing.
Footstep three: Take the clutch master cylinder and put it into a vise. Clench downwards until the cylinder will not move.
Place the slave cylinder on a stool or something to support it.
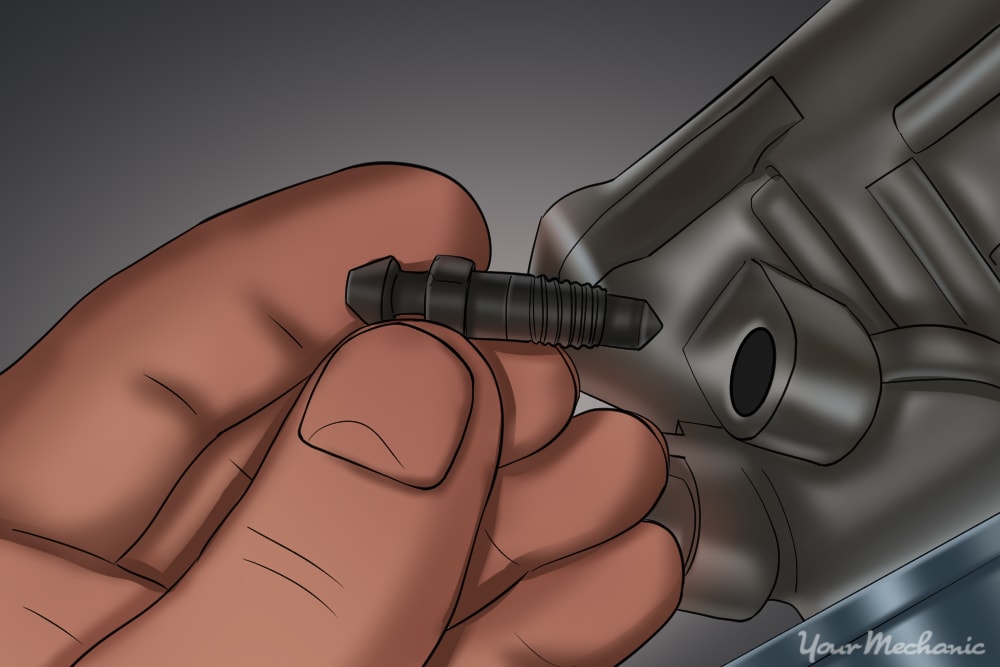
Step iv: Remove the bleeder screw. Place a drip pan underneath the slave cylinder and remove the bleeder spiral.
Step 5: Fill the reservoir up with brake fluid. Leave 1/4 inch from the peak empty.
Step 6: Use the contumely punch as an extension to prime the cylinder. Slowly pump the cylinder from the dorsum of the clutch master cylinder.
Watch for the brake fluid to drip out of the slave cylinder. You will have to make full the reservoir virtually three times to fill the unabridged organisation. This primes the cylinder and removes well-nigh of the air within the cylinder, hydraulic line, and slave cylinder.
When there is a solid stream of restriction fluid coming out of the bleeder pigsty on the slave cylinder, stop and install the bleeder screw.
Step 7: Get a helper. Have the helper apply the brass dial and pump the cylinder.
Yous then would need to loosen the bleeder screw to allow air to escape every bit brake fluid runs out.
- Note: Y'all may need to loosen the bleeder screw up a few times during pumping cycles to remove all air in the hydraulic system.
Stride 8: Make sure that the bleeder screw is tight. Fill the reservoir with brake fluid to the fill line and install the reservoir cap.
Part half-dozen of 8: Installing the new clutch slave cylinder
Materials Needed
- Allen wrench prepare
- Boxed end wrenches
- Contumely punch
- Billow bar
- Drip pan
- Fastener remover
- Needle nose plyers
- Ratchet with metric and standard sockets
- Torque wrench
- Torques bit set
- Vampire pump and bottle
- Wheel chocks
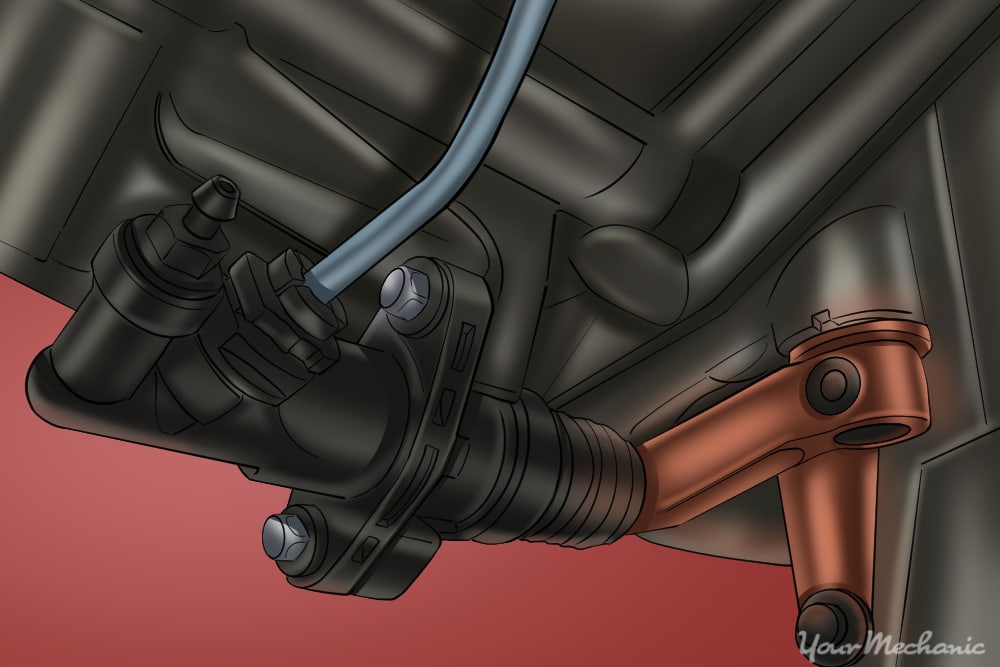
Pace ane: Catch your creeper and go under the vehicle. Install the clutch slave cylinder to the manual mount.
Finger tighten the bolts and then tighten them at 1/eight turn. If the slave cylinder had a clench, install the clamp and insure it is tight.
Pace ii: Get your drip pan and identify it under the slave cylinder. Remove the plastic bag from the clutch hydraulic line.
Install the clutch hydraulic line onto the slave cylinder.
- Warning: Do non cross thread the hydraulic line every bit you install it. Restriction fluid will leak out.
Stride 3: Bleed the hydraulic line to slave cylinder. Have a helper press the clutch pedal and hold information technology.
Loosen the bleeder spiral upward and let the air out of the arrangement. Tighten the bleeder screw and have the helper release the clutch pedal.
You may demand to perform the bleeding procedure a couple more time to remove all air. Tighten up the bleeder screw tight.
- Note: If the air does not all come out you volition demand to bleed the air from the line fastened to the clutch master cylinder. Follow the same procedures every bit yous did with the slave cylinder bleeder screw.
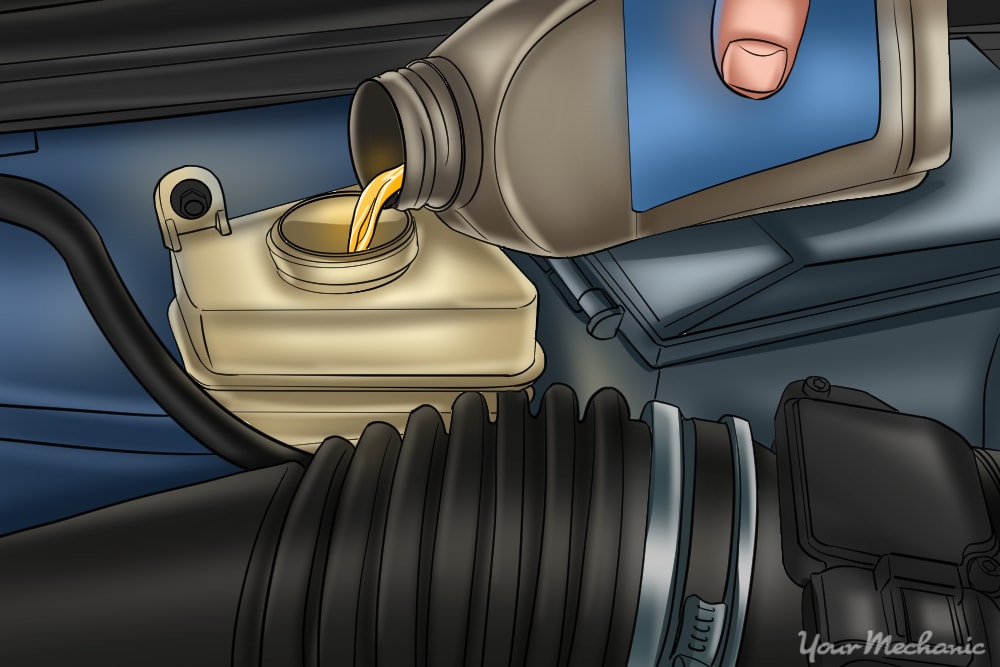
Stride iv: Elevation off brake fluid. Remove the reservoir cap and top restriction fluid off to the full line.
Role seven of eight: Installing the clutch hydraulic system assembly
Step i: Install entire system. Very carefully, install the entire system (clutch master cylinder, hydraulic line, and slave cylinder) downwards through the engine compartment.
- Warning: Exercise non bend the hydraulic line as information technology volition break.
Step 2: Install the slave cylinder. Go underneath the vehicle and install the slave cylinder by screwing in the bolts finger tight plus ane/8 plough or by installing the clench.
Step 3: Install the clutch master cylinder into the firewall.
Step four: Install mounting basics. Go in the driver's compartment of the vehicle and install the mounting nuts onto the clutch chief cylinder.
Torque them downwards to the specifications that will exist given in the parcel. If there is no instructions, so tighten the bolts past hand plus 1/viii turn.
Step five: Install the anchor pin into the clevis of the push rod.
Step 6: Install a new cotter pin. Install it in the anchor pin on the clevis attached to the clutch principal cylinder button rod with a pair of needle olfactory organ plyers.
- Warning: Do non utilize the old cotter pin due to work harden and fatigue. The old cotter pin could break prematurely.
Step vii: Install mounting insulated clamps. Get back to the engine compartment and install all mounting insulated clamps that mount the hydraulic line to the vehicle.
- Note: Go on in mind, the clutch hydraulic organisation assembly is already primed and full of fluid with all of the air out of the system.
Step 8: Heighten the vehicle. Using a floor jack, elevator nether the vehicle at its specified jacking points until the wheels are completely off the ground.
Step 9: Remove the jack stands. Go along them far abroad from the vehicle.
Footstep 10: Lower the vehicle to where all four wheels are on the footing. Pull out the jack and put information technology aside.
Step 11: Remove the wheel chocks from the rear wheels. Put them aside.
Part 8 of 8: Testing the new clutch slave cylinder
Step one: Make sure that the manual is in neutral. Turn on the ignition key and start the engine.
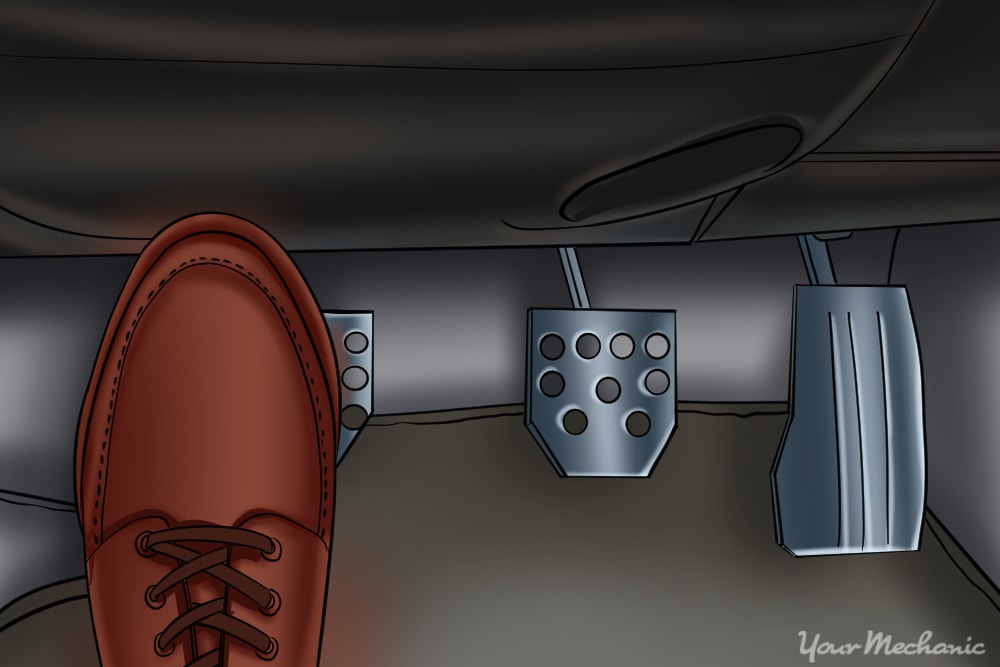
Footstep ii: Press down on the clutch pedal. Move the gear shifter to a selection of your choice.
The shifter should slide hands into the gear selected. Shut the engine off when you are done with the test.
Step three: Drive the vehicle effectually the block. During the examination drive change gears from first gear to the top gear one at a time.
Stride iv: Press the clutch pedal down. Practise this when moving from the selected gear to neutral.
Step 5: Press the clutch pedal down once more. Do this when moving from the neutral position to another gear selection.
This is process is called double clutching. This insures that the transmission has little to no power from the engine with the clutch disengaged properly. The process is to foreclose clutch damage and transmission gear damage. If you do not hear whatsoever grinding and the shifting feels smooth from one gear to another, then the clutch main cylinder has been fixed correctly.
If you cannot engage the transmission into any gear without grinding or if the clutch pedal will non move, then there may be further diagnosis of the clutch pedal assembly or a possible transmission failure. If the trouble persists, so you should seek out assist from one of our certified mechanic that can audit the clutch and transmission and diagnosis the trouble.
The statements expressed above are simply for informational purposes and should be independently verified. Please encounter our terms of service for more details

Source: https://www.yourmechanic.com/article/how-to-replace-a-clutch-slave-cylinder-by-marvin-sunderland
Posted by: taylortheard.blogspot.com
0 Response to "How To Change Clutch Slave On 1993 Sonoma"
Post a Comment